QC notes to timeline markers
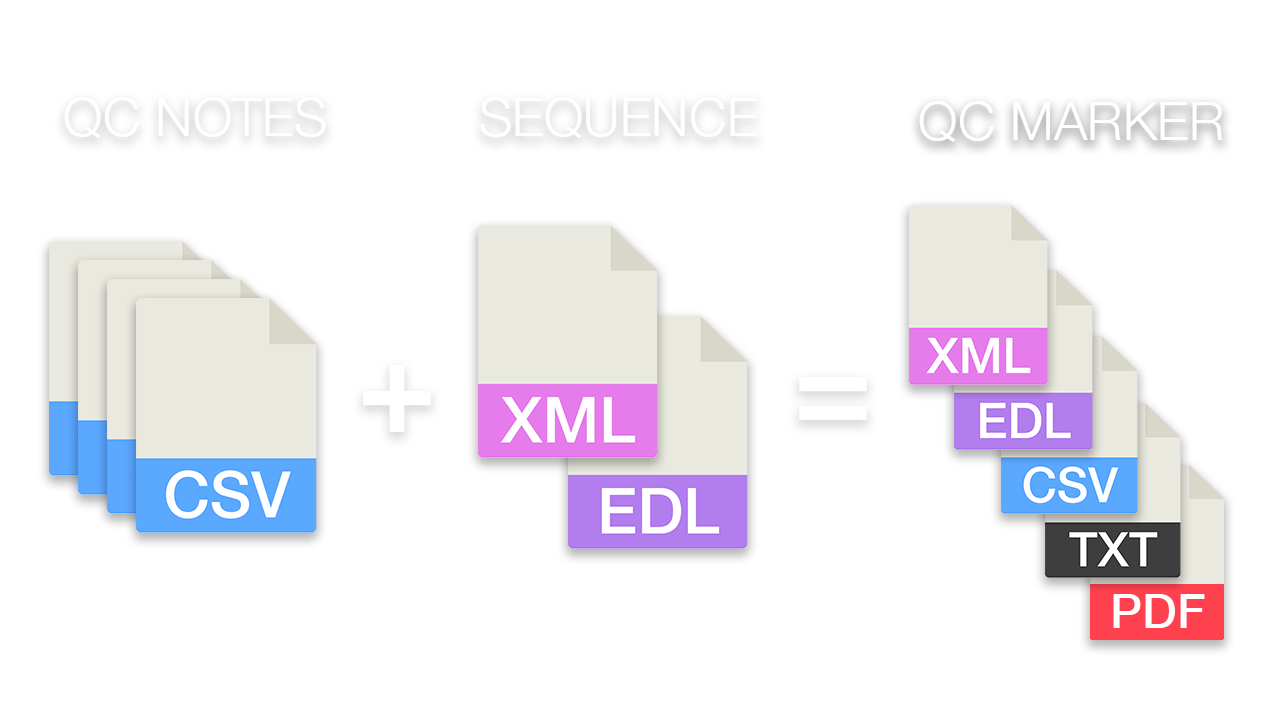
This tool lets you move quality control notes related to files and source timecode to the right place in the final editing sequence. Upload one or more QC files and one editing sequence to filter and match the notes. Then, export them as sequence markers or list.
en cours...
QC Marker Colors
![]() Red: QC notes within the defined range
Red: QC notes within the defined range
![]() Yellow/Orange: QC notes before the cut time range
Yellow/Orange: QC notes before the cut time range
![]() Pink: QC notes after the cut time range
Pink: QC notes after the cut time range
QC Notes
The QC notes can be uploaded as CSV or TSV files. Have a look at the structure of the following example files.
CSV | TSV | Silverstack |
|---|---|---|
| A simple csv demo file with qc markers. CSV Demo File |
A simple tsv demo file with qc markers. TSV Demo File |
A simple silverstack demo file with qc markers. Silverstack Demo File We recommend using a CSV file separated by semicolons from Silverstack! |
At a minimum, the following information is required from the uploaded QC notes:
-
ClipName: This is the assigned name of a video file, this could for example look like: "A001C002_200601_R1AD". The following alternate column names are also recognized as ClipName, ignoring case sensitivity:
Clip, ClipName, File, FileName, Name Timecode (Start): This is the timecode in the original material at which a QC marker was set. The timecode must be in the format "HH:MM:SS:FF". The following alternative column names are also recognized as timecode (start), ignoring case sensitivity:
Timecode, In, TC In, Start, TC Start, Timecode In, Timecode Start, At Timecode
Exception 1: If a marker applies to the whole clip, one of the following values may be defined instead of the timecode:
00:00:00:00, Entire Shot, Complete, allException 2: The timecode field may also contain a range marker. Then it must contain a content according to the following pattern: "
HH:MM:SS:FF - HH:MM:SS:FF" for example "12:02:31:10 - 12:02:44:01". Still it's recommended to use a "Timecode End" column instead.Timecode (End): This is optional and is only needed for range markers, i.e. the end of the QC marker. The timecode must be in the format "HH:MM:SS:FF". The following alternative column names are also recognized as timecode (end), ignoring case sensitivity:
Out, TC Out, Timecode Out, End, Timecode End, End TimecodeNote: The description of the QC note. Please avoid commas in the notes if possible. The following alternative column names are also recognized as Note, ignoring case sensitivity:
Note, Notes, Comment, Comments
Other special cases:
CSV File from Silverstack
Value needs to be seperated by Semikolon, e.g.: Name;Label;Episode;Scene;Shot;Take;Cue Points
The CSV File needs to have at least a "Name" and "Cue Points" column. Every Cue Point needs to contain a TC, Marker Typ, Length and QC Note, seperated by a vertical bar "|". Cue Point Notes can not contain any Comma. Example: 12:19:47.03 | Mark | 0 | focus
Multiple Cue Points need to be seperated by Comma, e.g.: 12:19:47.03 | Mark | 0 | focus, 12:22:35.21 | Mark | 0 | camera shake
Please check the demo file above.
Can I upload more than 15 csv/tsv files?
Yes, this is possible. Please create a .zip file with all of your csv/tsv files and upload the one zip file instead of your csv files.
EDL sequence
You can import CMX3600 EDL files (including File16 and File32) from any editing software. Remember that EDLs only support one video track. If your footage has a different frame rate than your timeline, there might be a quality control marker offset. This is because the framerate information is missing.
XML sequence from Premiere Pro
The tool can process XML files in the "Final Cut Pro 7" XML type, for example from Premiere Pro. If you're using Multi-Cam Clips in Premiere Pro, make sure to flatten your sequence before you export it. To do so, select all files, right-click, and select "Multi-Camera" then "Flatten Clips."
FCPXML sequence
The tool works with FCPXML sequences, but not all clip types. Also, make sure to flatten multi-cam clips.
Export/Download
DaVinci Resolve Marker EDL
How to Import Timeline Markers?Create a new timeline or open a timeline in your project
Make a right click on the sequence timeline in your media tab. It will open an popup.
Navigate to: Timelines > Import > Timeline Markers from EDL
Select the edl marker file for Resolve and the markers will be loaded.
In case you don’t see any markers, make sure they are in the right timecode area and try to zoom out of your timeline.If you can not find the option „Timeline Markers from EDL“ make sure you selected a sequence in your media tab.
Resolve does not support special chars in markers.
Adobe Premiere Pro Marker XML
How to Import Timeline Markers?Go to: File -> Import
Select a xml file with markers and import.
In case you don’t see any markers, make sure they are in the right timecode area and try to zoom out of your timeline.
Other Export Formats: CSV & TXT
- CSV with the following columns:No., Timecode In, Timecode Out, Frame In, Frame Out, Name, Comment, Color, File Name, File- Simple Text File (TXT) with the following informations:
Timecode, Filename, QC Note
Working with Duplicates
Please make sure that you use unique file names in your production. If you have multiple files with the same filename in your project, the converter will add all qc markers to those files. File comparisons are not case-sensitive.
Data Storage
All uploaded files are processed immediately and not stored on the server.
Get more with Pro
This is one of our premium tools developed with our Pro members. To take full advantage of this tool, you need to upgrade to a Pro account.
However, you can still try it out for free.
Check out all Pro Features| Free | Pro Users |
|---|---|
| Export is limited to the first 15 QC notes. | No limit. |
Tags
Tools CSV EDL JSON PDF TXT XML Adobe Premiere Pro Avid Media Composer ByteDance CapeCut DaVinci Resolve Final Cut Pro Silverstack Tools for DIT Tools for Netflix Workflows
Optimize film editing and
post-production workflows.
🇪🇺 Made in Europe
© 2026 EditingTools.io🇪🇺 Made in Europe
© 2026 EditingTools.io